GitHub Actionsでソースコードを管理しAWSへデプロイするケースはよくあると思います。しかし、適切に認証情報を管理しないと思わぬ事故が発生してしまいます。 今回はAWS CDKによるAWS環境をGitHub Actionsを使用して自動でデプロイする環境を対象に、ベストプラクティスに沿った権限設定の方法をご紹介します。
本コラムでは自動化編として、準備編で行った手動のデプロイ作業を、GitHub Actionsを使用して自動化する手順を解説します。準備編はこちら
GitHub Actionsからのデプロイ
いよいよ本題のGitHub Actionsからのデプロイです。以下の手順で作業を行います。
- リポジトリの準備
- OIDCプロバイダーとIAMロールの作成
- GitHub Actions のワークフローの作成
AWSへデプロイする際には認証情報が必要ですが、OpenID Connect (OIDC)を使用することで、GitHub ActionsからAWSリソースへのアクセスが可能となります。
参考:Configuring OpenID Connect in Amazon Web Services
1.リポジトリの準備
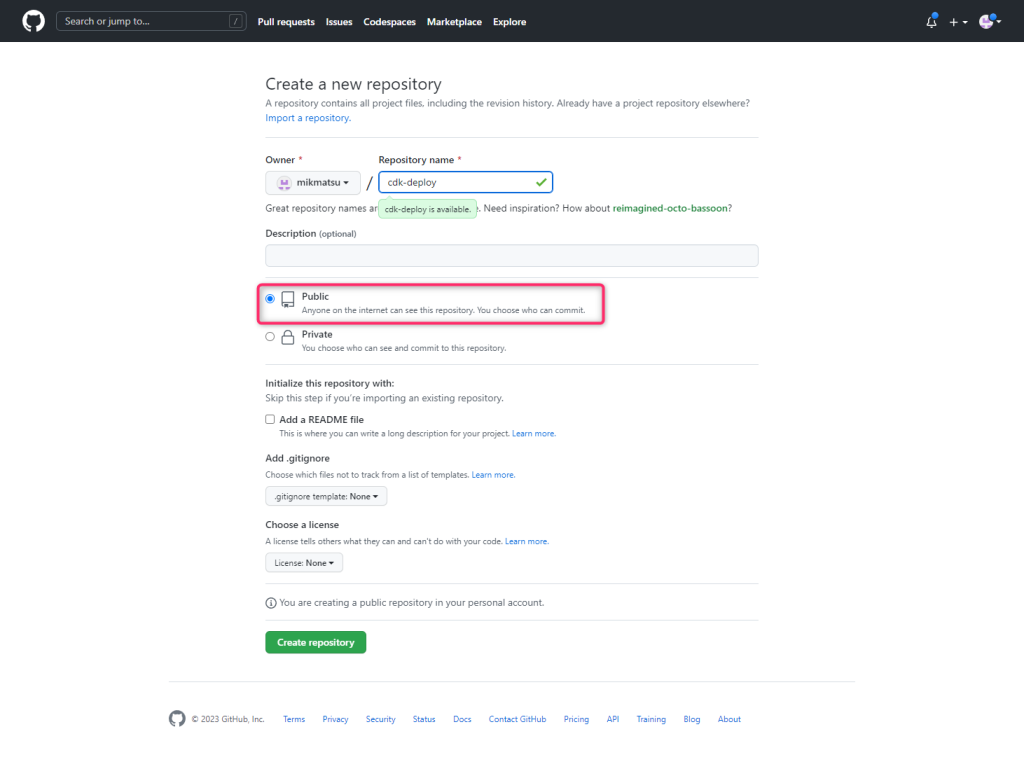
GitHub Actionsにリポジトリを作成します。今回はパブリックリポジトリを利用します。

2.OIDCプロバイダーとIAMロールを作成
IAMにOIDCプロバイダーとIAMロールを作成します。 GitHub ActionsのドキュメントにあるAWS CloudFormationテンプレートのサンプルを少しだけ改変し、IAMロールにポリシーを追加します。
AWSTemplateFormatVersion: "2010-09-09"
Description: Created OIDC Provider and IAM Role.

Parameters:
  GitHubOrg:
    Type: String
  RepositoryName:
    Type: String
  OIDCProviderArn:
    Description: Arn for the GitHub OIDC Provider.
    Default: ""
    Type: String

Conditions:
  CreateOIDCProvider: !Equals
    - !Ref OIDCProviderArn
    - ""

Resources:
  Role:
    Type: AWS::IAM::Role
    Properties:
      AssumeRolePolicyDocument:
        Statement:
          - Effect: Allow
            Action: sts:AssumeRoleWithWebIdentity
            Principal:
              Federated: !If
                - CreateOIDCProvider
                - !Ref GithubOidc
                - !Ref OIDCProviderArn
            Condition:
              StringLike:
                token.actions.githubusercontent.com:sub: !Sub repo:${GitHubOrg}/${RepositoryName}:*
      Policies:
        - PolicyName: deploy_github_policy
          PolicyDocument:
            Version: "2012-10-17"
            Statement:
              - Effect: Allow
                Action: sts:AssumeRole
                Resource: arn:aws:iam::*:role/cdk-*

  GithubOidc:
    Type: AWS::IAM::OIDCProvider
    Condition: CreateOIDCProvider
    Properties:
      Url: https://token.actions.githubusercontent.com
      ClientIdList:
        - sts.amazonaws.com
      ThumbprintList:
        - 6938fd4d98bab03faadb97b34396831e3780aea1

Outputs:
  Role:
    Value: !GetAtt Role.Arn
このテンプレートを使用し、AWSリソースを作成します。 OIDCプロバイダーとIAMロールの作成後、IAMロールのAmazon リソースネーム(ARN)がAWS CloudFormationのOutputsに出力されます。GitHub ActionsでこのIAMロールを指定します。 また、AWS CLIをスイッチロールで実行させるため、事前準備で~/.aws/config内に定義したプロファイル名” deploy_role”を利用するように指定します。
$ aws cloudformation deploy \
 --stack-name github-oidc \
 --capabilities CAPABILITY_IAM \
 --template-file cf-template.yaml  \
 --parameter-overrides GitHubOrg=mikmatsu RepositoryName=cdk-deploy \
 --profile deploy_role

Waiting for changeset to be created..
Waiting for stack create/update to complete
Successfully created/updated stack - github-oidc
IAMロールのARN確認
$ aws cloudformation describe-stacks --stack-name github-oidc --profile deploy_role  | jq -r '.Stacks[] | .Outputs[]'
{
  "OutputKey": "Role",
  "OutputValue": "arn:aws:iam::{aws_account_id}:role/github-oidc-Role-PGMQKDD8P10J"
}
GitHub Actions のワークフローを作成
ワークフローファイルを作成します。本作業は準備編でWebアプリケーションを作成したmy-appディレクトリー内で実行します。
$ mkdir -p .github/workflows
$ touch .github/workflows/cdk_deploy.yml
OIDCでの認証に必要な記述はpermissionsの部分とuses: aws-actions/configure-aws-credentials@v1-node16の部分です。 また、今回はGitHub ActionsのSecretsに予めAWSアカウントIDを設定する前提で記述します。
name: deploy to s3
on: [push]

permissions:
  id-token: write # This is required for requesting the JWT

jobs:
  build:
    runs-on: ubuntu-latest
    steps:
      - uses: actions/checkout@v3

      - uses: actions/setup-node@v3
        with:
          node-version: 18

      - run: npm ci

      - run: npm run build

      - uses: aws-actions/configure-aws-credentials@v1-node16
        with:
          aws-region: ap-northeast-1
          role-to-assume: arn:aws:iam::${{ secrets.AWS_ACCOUNT_ID }}:role/github-oidc-Role-PGMQKDD8P10J

      - run: npm ci
        working-directory: ./cdk

      - run: npx -y cdk deploy --require-approval never
        working-directory: ./cdk
3.GitHub Actionsのリポジトリにソースをプッシュ
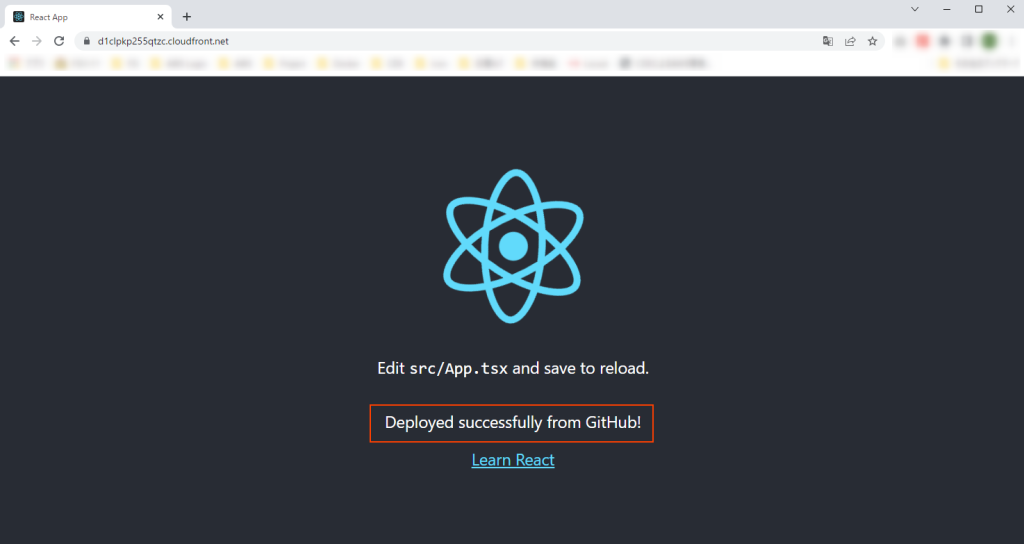
準備が整いましたのでGutHubにプッシュし、ActionsからAWS環境へのデプロイを確認します。その前に、Actionsからデプロイされたことが分かるように、Webアプリケーションを一部改修しておきます。src/App.tsxを修正し、Webサイトのトップ画面に、”Deployed successfully from GitHub!”という文字列が表示されるように設定します。
import React from 'react';
import logo from './logo.svg';
import './App.css';

function App() {
  return (
    <div className="App">
      <header className="App-header">
        <img src={logo} className="App-logo" alt="logo" />
        <p>
          Edit <code>src/App.tsx</code> and save to reload.
        </p>
        <p>
          Deployed successfully from GitHub!
        </p>
        <a
          className="App-link"
          href="https://reactjs.org"
          target="_blank"
          rel="noopener noreferrer"
        >
          Learn React
        </a>
      </header>
    </div>
  );
}

export default App;
さらに、プッシュ時にcdkフォルダ内のソースをプッシュできないため、cdkフォルダ内の.gitを削除します。
$ rm -rf cdk/.gitソースをコミットし、GitHubへプッシュします。 GitHubへプッシュするためのトークンやSecretsの設定については割愛していますので、実際に行う方は適宜設定をお願いします。
$ git add .
$ git commit -m "first commit"
$ git remote add origin https://github.com/mikmatsu/cdk-deploy.git
$ git push --set-upstream origin master
Username for 'https://github.com': mikmatsu
Password for 'https://mikmatsu@github.com':
Enumerating objects: 44, done.
Counting objects: 100% (44/44), done.
Delta compression using up to 16 threads
Compressing objects: 100% (37/37), done.
Writing objects: 100% (44/44), 187.88 KiB | 8.95 MiB/s, done.
Total 44 (delta 1), reused 0 (delta 0)
remote: Resolving deltas: 100% (1/1), done.
To https://github.com/mikmatsu/cdk-deploy.git
 * [new branch]      master -> master
Branch 'master' set up to track remote branch 'master' from 'origin'.
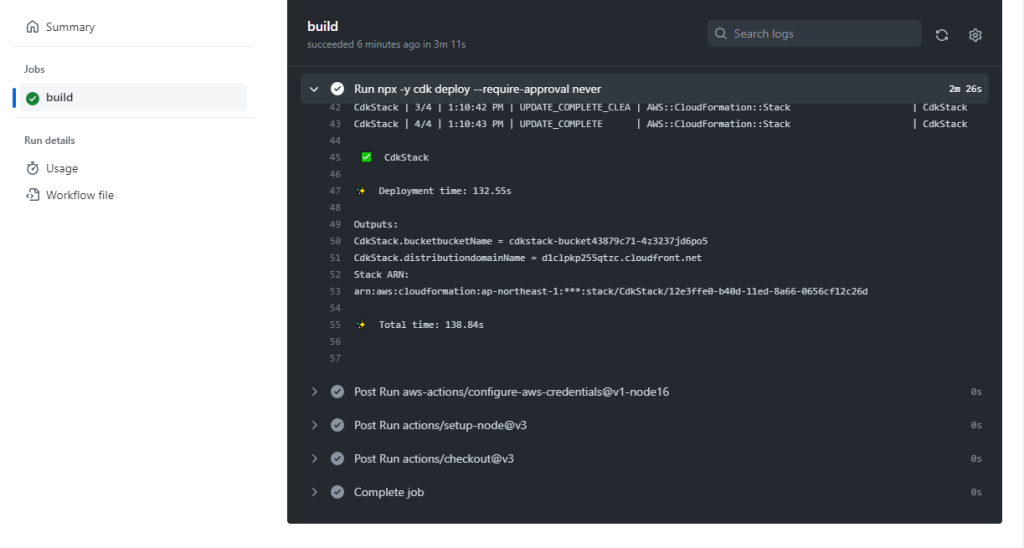
GitHubのActionsの画面を確認したところ、AWS CDKの実行を含め正常に動いていることが確認できました。

また、デプロイされたAWS環境を確認し、修正した内容が反映されていることも確認できました。

AWS CDKによるAWS環境構築を、GitHub Actionsを使用して自動化する手順をご紹介しました。一度設定しておけば、ソースをプッシュするたびに自動でデプロイが可能なので、コーディングを始める前に設定するよう心がけましょう。
富士ソフトのAWS関連サービスについて、詳しくはこちら


